As I promised in this post, here is a full entry dedicated to decopatch. I haven't mentioned on here that I am to be married, even though my wedding is a whole year away I am starting with all my decor now because (A.) I just can't wait and (B.) I like to be organised and (C.) as I am doing it all myself it is going to a while! The theme we are having is rustic red roses hence the red rose paper I will be using and the twine to hang.
I started off with the following:
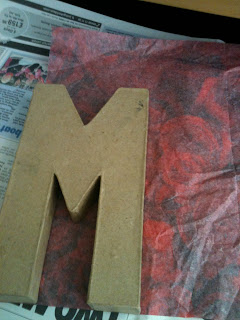
- My chosen letters M (for Mark) & and Y(for Yasmin obviously). MR AND MRS would also be an option but I'm a budget bride!
- Decopatch red rose paper, 2 sheets was enough for 3 letters.
- Decopatch glue
- Decopatch brush
Here are some links to online sites with Decopatch supplies
These are the instructions I was given:
The instructions are pretty much self explanatory, it's not rocket science just fun fun fun! I kind of experimented for each letter but found my technique for letter M the most successful as I was only using one design I wanted the pattern to be continuos so you could really see the red roses but if you were using different papers the instructions above are suitable.
What I did was traced the letter twice onto the wrong side of paper
Cut out traced M outline x2 and some smallish rectangles to cover the sides. I also carefully pressed the M's to remove the crumples (not shown below!)
I firstly covered all around the sides with the small rectangles using the technique described in instructions.
Once the sides were covered I then stuck down my cut out M letters onto the front and back of the letter. I did wait till one side was completely dry before I did the other side, hairdryer came in handy for this!
Here are my finished letters:
To hang them I used twine and I'm not really sure what they're called but they came in a picture hanging kit.
I literally just poked them through (the letters are hollow), they are screws so they remain in place. I then cut 2 15inch pieces of twine for each letter, looped them through, double knot, snipped the ends off and joined the 2 pieces together to tie a bow.
Finished
Really hope you're inspired, happy decopatching. Beware very addictive, I'm already planning on decopatching everything in my flat! Please leave feedback if you use the tutorial would love to know how you get on or if you have any questions I would love to help!
Yasmin - Elizabeth
XOXO


No comments:
Post a Comment